How to Make the Most of Tulip Season
The tulip wave is just starting, which means we have weeks of stunning beauty ahead of us. After all the restraint and austerity of winter, that riot of color is almost too much.
You have a lot of choices for tulips, even this early in the season. So, I want to share a little guide for purchasing along with some with tips for how to make the most of your blooms when you get them home.

Freshly harvested “Gudoshnik” tulips from our fields
Tip #1 Buy the Best Quality
Tulips can be held in storage for a shockingly long time and they can stand up to some abuse. That means, it’s possible to grow them on giant automated factory farms with lots of chemicals, hold them in coolers for ages and then fly them around the world.
Like any commodity farming, growing at that scale allows producers to keep costs very low. So, when you see cheap tulips in the store, you can bet they probably started life in the Netherlands and had a crazy adventure getting to that bucket next to the oranges in the produce department. While they are undoubtably lovely and I’ve bought them myself many times, they are not going to last as long as a local tulip after all that storage, handling and travel.
Also, that kind of mechanized agriculture does not lend itself to any of the fancy tulips that take our breath away. You’ll be limited to single petals, simple colors and small blooms.
That’s totally fine. A flower is better than no flower. I’ve bought them myself.
But, if you want something extra gorgeous that will last a long time, focus on local. When you compare a locally grown tulip to an imported commodity tulip, it’s like they’re not even the same flower.
Imagine grocery store tomatoes in January beside a Brandywine still warm from the sun and fresh from your garden. I say that as someone who sometimes buys grocery tomatoes in January so no judgement. But still, given the choice, I’m going for that Brandywine.
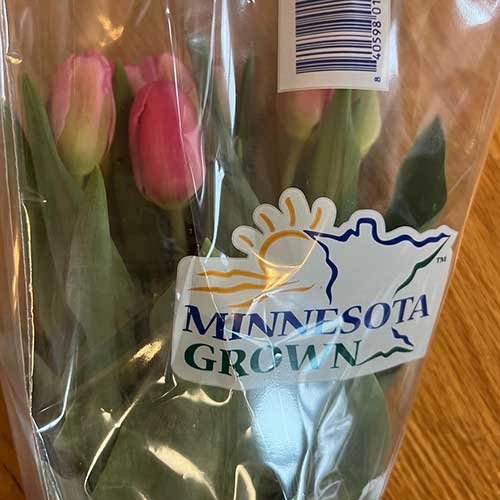
Buying local doesn’t necessarily mean buying from a local farm (although that’s a great idea). Check labels when you purchase in the store to see where the stems originated. I picked up these beauties at a Festival Food Store when I was visiting my parents in Minnesota and was thrilled to support a local grower while knowing I was giving my mom a treasure that she enjoyed for weeks.
Tip #2 If you cut your own, harvest at the right time
If you have tulips in your own garden, cutting at the correct stage will ensure the longest vase life. Single varieties should be harvested at what we call the “lipstick stage” - meaning the petals are still closed, mostly green with color beginning to form at the tips of the bloom. They’ll finish ripening and opening in the vase. That step alone will buy you about 5 more days, maybe a week. Plus it’s fun to watch them change.

These singles are just starting to color up into their “lipstick stage” and are ready to cut. They will continue to grow, open and deepen into shades of deep pink and apricot in the vase.
We’ve learned to wait a little longer to cut fancy doubles and peony type blooms. I look to see them open a little bit with the layers apparent but not fully blown. If you cut doubles too early, they rarely open. If they do, they’re small and disappointing. So, leave them in the field a bit longer than their single cousins.

Double tulips harvested at the best stage. These guys are called “Sensual Touch” - ridiculous name but a fabulous double fringed tulip that we love.
Tip # 3 Prep correctly
Start with hydration. When you get your tulips home, trim the ends and give them a good drink of water before you start arranging.
If they are wrapped in paper or plastic, keep that on during the hydration because it will hold the stems up and keep them from drooping before they have a chance to get a drink.
Use a clean snip or scissors to avoid transferring bacteria from your snip to the stem. A simple wipe with bleach will do.
Trim lower leaves. I typically take them all off, but you can leave a few in place if you want that color and texture in your design. Removing the leaves helps keep the vase clean, focuses the hydration on the blooms and eliminates bulk in your arrangement. At minimum, don’t allow any leaves below the water line in your vase.
Clean your vase. Tulips really don’t need flower food, but they do need clean water.
Tip # 4 Maintain
Tulips like it cool. So, keep them away from heat sources and sunny windows.
Keep the water clean by changing it out every day.
Trim the stems from time to time. They will cauterize off and have a diminished capacity to take up water. A fresh cut keeps them hydrated.
Tulips will continue to grow in the vase. Sometimes I cut them a little shorter than I really want them for the design and let them stretch into place. Or you can just let them go wild and enjoy watching them do their thing.
We talk about a tulip vortex around here. It feels like you are in one during fall planting and spring harvest because we grow so many. It’s all consuming. The spring tulip vortex is just opening on the farm and I’m ready to dive in.
I hope these tips help you enjoy the tulip vortex, tide, season or whatever you call it, a little bit more this year.
